This next one is for those that either love 3D Printing or are simply looking to get started with the awesome activity that is 3D Printing . As you most likely now, 3D Printing is a very precise method that allows you to make your own physical objects from a three-dimensional digital model. This process is typically done by having a dedicated 3D printer unit laying down many successive thin layers of a material – usually PLA (which stands for polylactic acid or polylactide), and this is a thermoplastic that’s made from renewable resources such as corn starch, tapioca roots or sugar cane, unlike other industrial materials that are made primarily from petroleum, thus making PLA one of the safest materials to use for 3D printing. Now, whether you’re looking for your first (or your next) 3D Printer unit, you’ll most likely want a model that packs at least the most necessary features for any 3D printer artist, including an easy setup or even functionalities such as Filament Runout Detection. With that said, and without any further ado, let me present to you the JGMaker A5S 3D Printer
The JGMaker A5S 3D Printer features a robust construction and a great performance overall, and offers you a large printing size of 12″ by 12″ by 12. 6″ with several cool printing features.
This 3D Printer is the updated version of the company’s original JGMaker A5 3D Printer, and on the JGMaker A5S, the “S” stands for “Special”. As stated before, this awesome 3D Printer features a reasonably large build volume of 12 inches by 12 inches by 12.6 inches (305 x 305 x 320 mm), which makes it a very reliable 3D Printer for miniature printing.
Now, one of the main things that makes this 3D Printer stand out from several other 3D Printer models on the market is its ease of assembly. With that said, the setup process for this 3D Printer is quite easy and pretty straightforward to go through, as this 3D Printer model includes an Instructions Manual with every step of the printer’s set-up process as well as each of the printer’s parts coming labelled with a corresponding number that ultimately helps users to very easily stay on track of the printer’s assembly process.
Additionally, the printer also packs a Smart Assistant Auto Levelling functionality, which allows the JGMaker A5S to automatically locate you’re desired leveling spot, and that should significantly save you some time on having to go through extra efforts when you’re looking to print your 3D models.
Other than that, this 3D printer also packs some very cool safety features including a Filament Run Out Detection Sensor as well as a reliable Resume Printing Power Failure Protection functionality, which, for the latter, basically allows the JGMaker A5S to resume its last printing process from wherever the last print was stopped due to a potential (and unexpected) power failure.
So, without further ado, let’s have a more detailed look at the JGMaker A5S and check out everything that this awesome and unique 3D Printer has to offer you.
DESIGN & SPECS
Starting with the JGMaker A5S 3D Printer’s size, the printer itself measures 21.10 inches long by 18.89 inches wide by 21.37 inches tall (536 x 480 x 543 mm). Additionally, this 3D Printer weighs exactly 30.42 lbs. (13.8 kg), which shouldn’t make it quite stable when having the printer installed on any reasonably sturdy table.
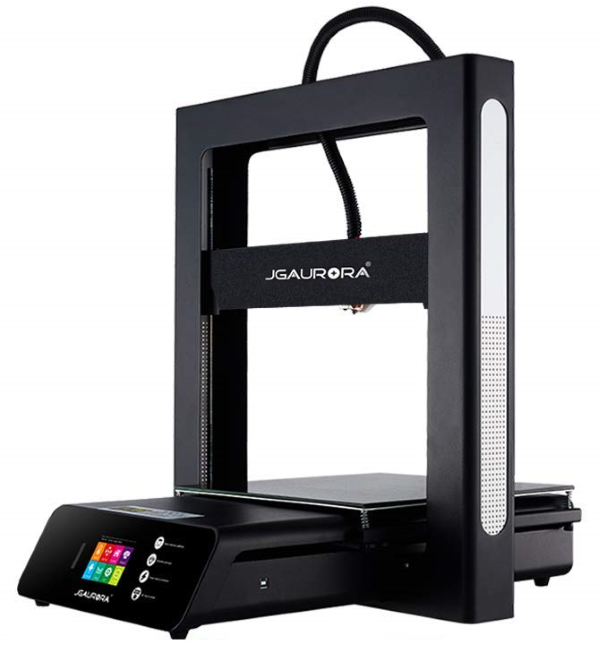
Now, as mentioned earlier, this 3D Printer also features a large build volume of 12 inches by 12 inches by 12.6 inches (305 x 305 x 320 mm).
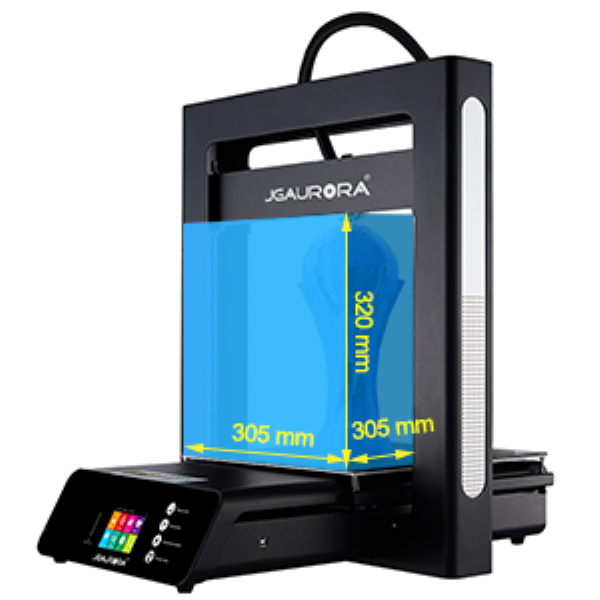
So, just like its fairly large body, the build volume on this 3D printer is actually quite big, which should be very interesting to 3D print any larger physical models/miniatures, especially when you’re looking to have any little details highly visible within your printed objects.
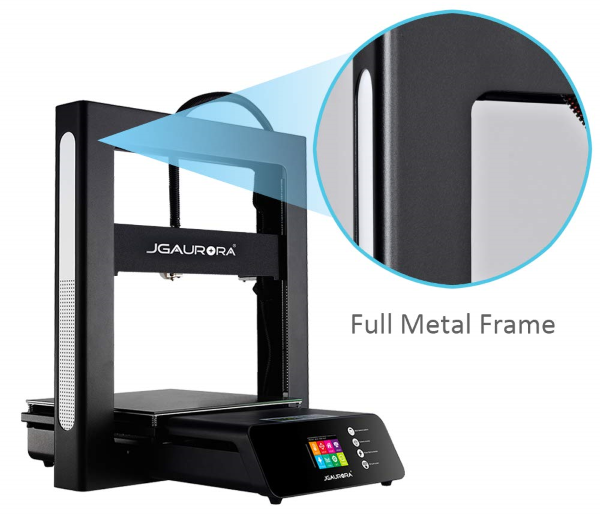
Moving on to the printer’s overall construction, the build on this 3D Printer is quite robust, as mentioned before. This 3D printer features a very solid structure that’s mainly built CNC sheet metal cutting craft, and as such, its full metal frame basically gives it a very sturdy construction that’ll keep the printer’s 3D Printing process fairly stable in order to ensure a smooth printing of any 3D models you’ve got planned to print in the future.
The printer’s Z-Axis is moved by a Dual Z Lead Screw that works together with its built-in stepper motor to accurately drive the Z-Axis of the JGMaker A5S through each 3D printing process, which ultimately decreases the likelihood of printing errors. That basically helps the printer to improve its 3D printing accuracy and precision, thus allowing the printer to deliver a specified Z-Axis accuracy of 0.001mm.
This level of precision not only gives the printer a professional accuracy-printing level, but ultimately makes the JGMaker A5S a truly professional 3D printer that you can easily rely on. All that makes this a great 3D Printer choice for small-scale makers and DIYers to go with, instead of forcing 3D Printing beginners to stick to amateur equipment.
Speaking of its built-in stepper motor, this is exactly what powers the 3D printer’s extruder, which, when compared to the original A5 3D Printer’s extruder, this 2nd-gen 3D printer now features its extruder to be moved slightly higher from its original position in order to shorten up its tube.
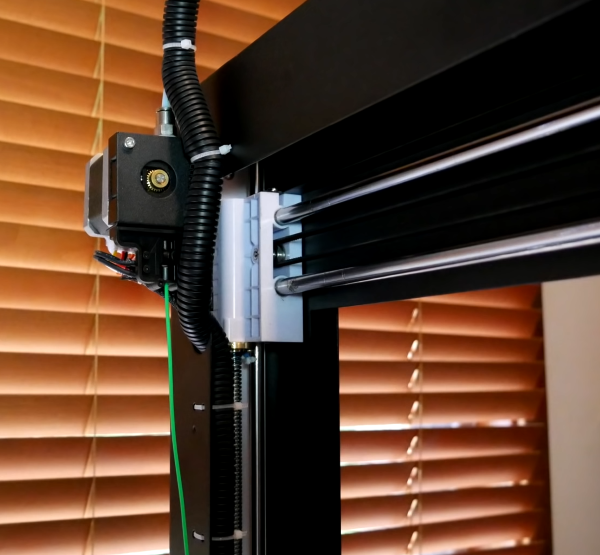
Additionally, this 3D Printer also comes equipped with a patented High-Precision Independent Nozzle Structure – which integrates a nozzle with an exact diameter of 0.4 mm – that effectively helps the unit to prevent clogging from occuring while 3D Printing.
The printer also comes equipped with a very stable Black Diamond Glass Platform that’s mainly made of a high-strength composite coated glass, and the printer’s stable and sturdy glass platform offers you a strong printing adhesion for its PLA 3D prints while also allowing you to easily remove any of your printed 3D models, as those will never stick / get “glued” to the printer’s glass platform after you use the JGMaker A5S for your 3D Printing projects.
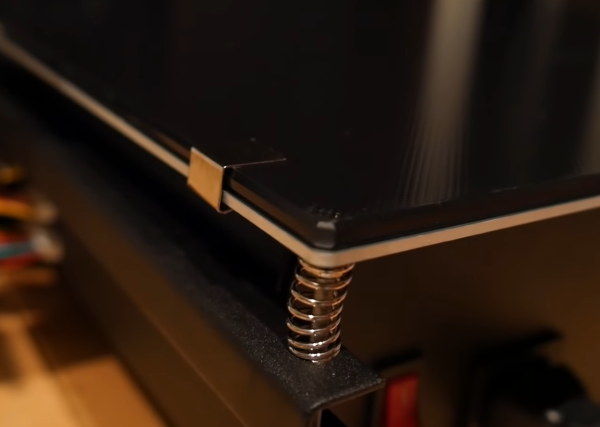
As any experienced 3D Printing enthusiast will tell you, PLA can sometimes be quite sticky. However, that shouldn’t be much of a concern for you when using the JGMaker A5S as your go-to 3D Printer, since all you have to do is to gently pull on your freshly 3D printed model/miniature to remove it from the printer’s ultra-stable Black Diamond Glass Platform.
Originally (and interestingly enough), the printer’s glass platform came covered in blue painter’s tape, which the package’s cryptic note advises you to note remove.
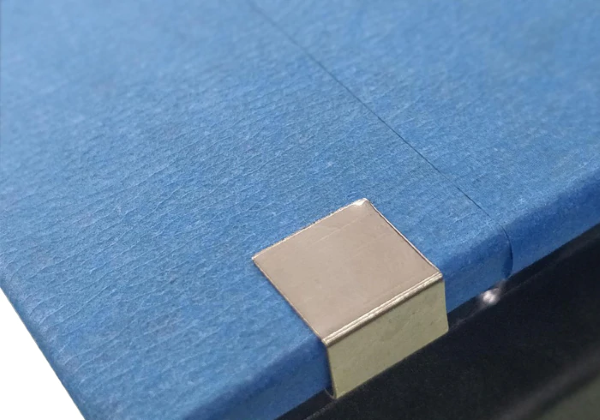
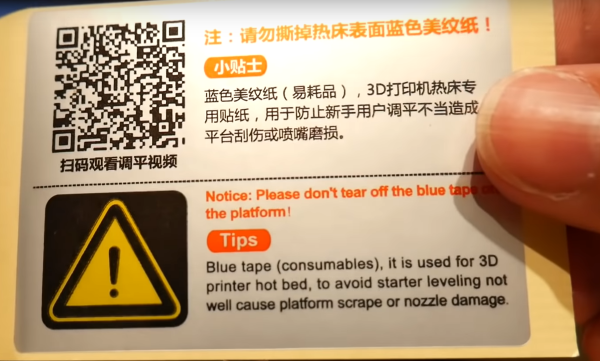
However, since its glass bed is designed to work together with a Metal Heated Bed (meaning a BDG Heated Platform) underneath it, and that combination is exactly what will offer you an easier removable of your printed models when using just the glass platform (without its blue painter’s tape covering). Furthermore, that’ll also allow you to save on masking tape. So, for any experienced 3D Printing users, I’d actually advise you to remove this blue-tape covering.
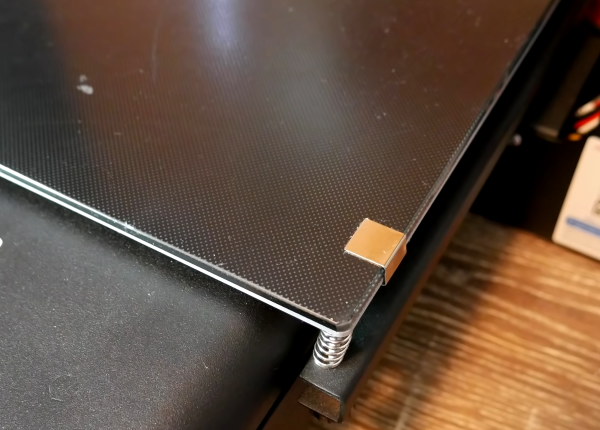
While the blue-tape covering does in fact keep the 3D printer’s glass bed perfectly lined up against its Metal Heated Bed, you’re still offered 4 metal clamp-attachments that allow you to hold the 3D printer’s glass platform into place against its BDG Metal Heated Platform.
Overall, it’s really nice to have these clips so that you don’t ever have to worry about bulldog clips which can clash with the printer’s nozzle.
Now, moving on to its main internal component, the printer’s 32-bit ARM Processor is what’s responsible for running all of its printing tasks, and this 32-bit CPU comes integrated on top of the printer’s in-house-developed Mainboard.
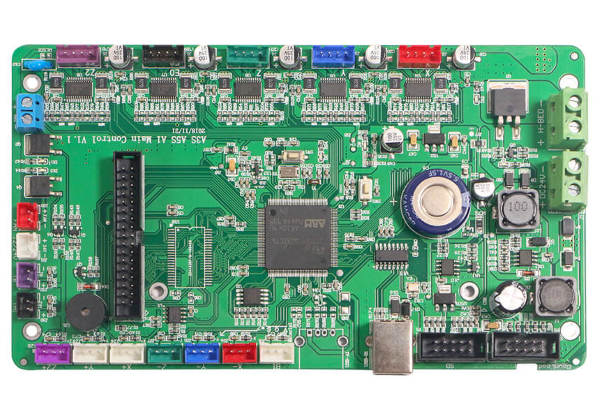
This 32-bit Mainboard uses a whooping 5984 Allegro stepper motor drivers with 32x micro-stepping, which should definitely pack a punch for the unit’s 3D Printing capabilites.
Printing & Power Specs
For the JGMaker A5S’ Printing-Specs, this 3D Printer can offer you a Layer Thickness that can vary between 0.1 and 0.3 mm, an exact Filament Diameter of 1.75 mm, and a Printing Speed of 10 to 150 mm.
Lastly, this 3D printer is powered by a Certified Power Supply, which features a power requirement of AV 110~220V/50HZ AC.
SET UP
As mentioned at the beginning of the article, one of the main things that makes this 3D Printer stand out from several other 3D Printer models on the market is its ease of assembly. Fortunately, I found out that this 3D Printer’s setting up process easily lived to the unit’s expectations, which is something that’s also highly praised by the company.
So basically, this 3D printer already comes with its two main-components pre-built within the package, and those are its main-frame and its Y-axis, which, since these already come built, it should only take you between 10 to 15 minutes for setting up the 3D Printer after unboxing it.
Other than its two pre-built main-components – meaning its main-frame and its Y-axis – the only other thing you have to do is to quickly install its eleven (x11) bolts in order to easily attach the printer’s two halves together (the main-frame and its Y-axis). Other than that, it’s really just plugging it to power and turning it on.
Speaking of plugging in the 3D Printer to power, its wiring design works quite well. Unlike several 3D Printer models that you can currently find available on the market, the JGMaker A5S 3D Printer comes with its wiring nicely concealed which ultimately allows you to plug in the 3D Printer to power in a matter of seconds. With that said, you won’t have any wires getting in your way whenever you’re engaged in your 3D Printing activities.
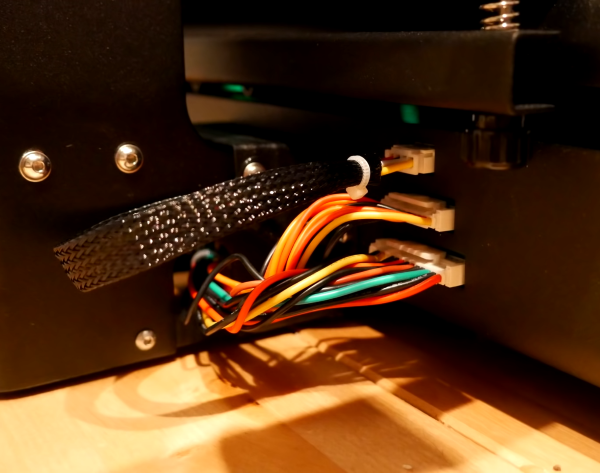
Now, while the unit is somewhat heavy, you can still easily set up this 3D printer by yourself. Then, as soon as you’re done assembling it, it should only take you up to a maximum of 30 mins to have this 3D Printer printing your very first 3D sample.
Overall, this 3D Printer model was quite easy to build and extremely easy to operate.
INTERFACE
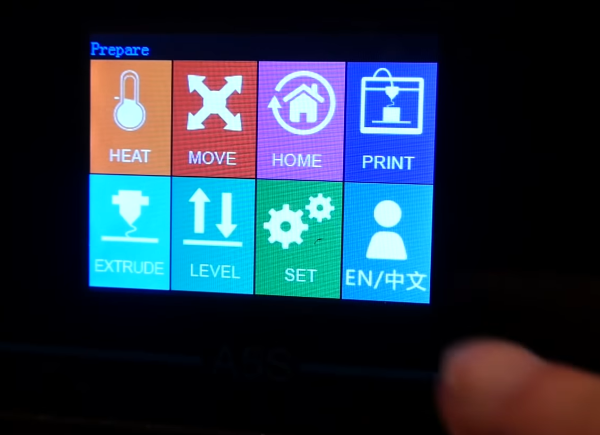
Speaking of operating the 3D Printer, the JGMaker A5S comes equipped with a 2.8 Inches High-Definition Capacitive Color Touch Screen Display that convenitenly offers its users an extremely user-friendly User Interface.
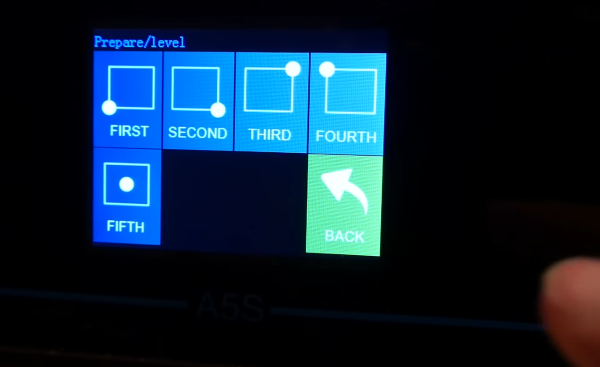
The levelling process is manual but pretty straightforward thanks to the 3D printer’s Assisting Menu. Basically, this Assisting Menu allows users to conveniently move the printer’s nozzle to any of the four corners as well as the middle, where you can use any regular sheet of paper to put between the printer’s glass bed and its printing nozzle in order to adjust the printer’s thumb screws until that same sheet of paper just perfectly fits underneath the nozzle.
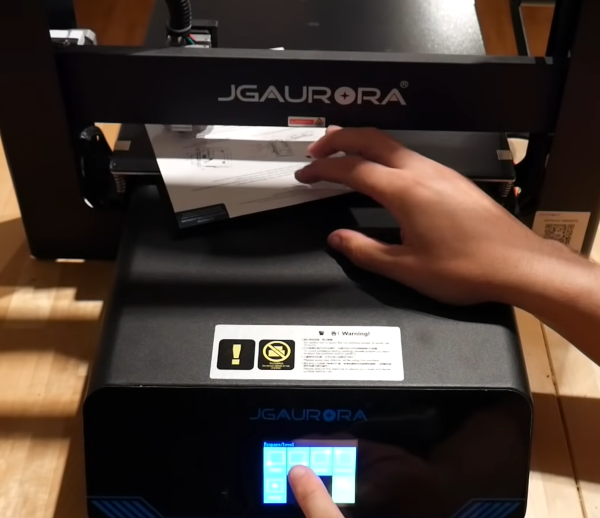
While the printer’s levelling knobs are somewhat small, they’re still very easy to reach anyways.
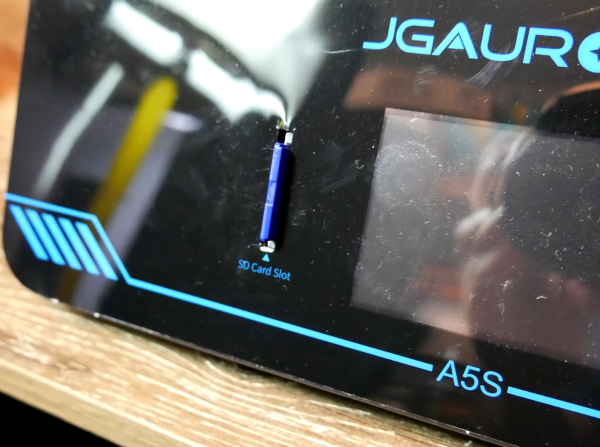
Additionally, the JGMaker A5S also comes equipped with a SD Card Slot that can be used together with its included SD card – which contains software, test sample files and an operation manual – to have a fun an easy time 3D Printing.
OTHER NOTABLE FEATURES
Smart Assistant Auto Levelling
The printer’s Smart Assistant Auto Levelling functionality allows the JGMaker A5S to automatically locate you’re desired leveling spot, which significantly save you some time on having to go through extra efforts when you’re looking to print your 3D models.
Filament Run-Out Detection
The A5S 3D Printer also comes equipped with a Filament Run-Out Detection Sensor, which is there for the potentially unfortunate event of your filament running out too soon. This ultimately makes the A5S 3D Printer capable of detecting that exact occurrence, which will then trigger the unit to pause your print so you can fit a new spool of filament and resume the print, thus saving you from any potential failed print disasters.
Additionally, this will also ensure that the printer’s extruder stays safe and protected from heating up whenever there is no new filament being fed to the printer by simply shutting the printer down after the maximum time of 1-hour of leaving the printer operating by itself (meaning with no user-monitoring).
Power Failure Protection
Lastly, the printer’s Resume Printing Power Failure Protection allows the JGMaker A5S to resume its last printing process from wherever the last print was stopped due to a potential (and unexpected) power failure.
Furthermore, for any times that the printer’s SD card gets removed accidentally from the printer during its 3D Printing process (for whatever unfortunate reason), you can continue conveniently get back to your 3D Printing project by simply reinserting the SD card, which will trigger the printer to start operating once again.
WHAT’S IN THE BOX?
The JGMaker A5S 3D Printer comes extremely well packed inside a cardboard box, with each of its parts coming perfectly protected and extremely well secured withing a styrofoam palete.
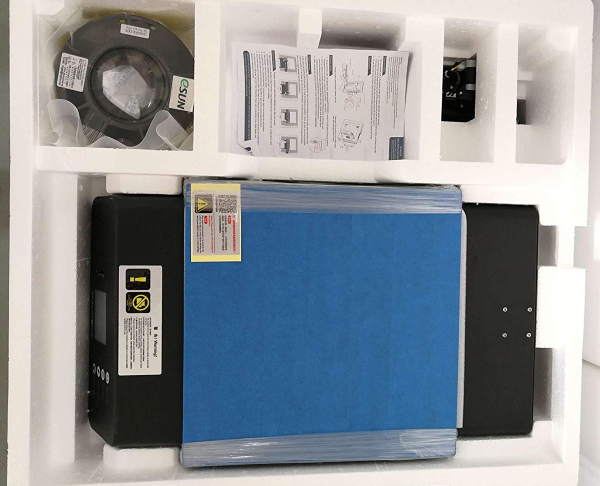
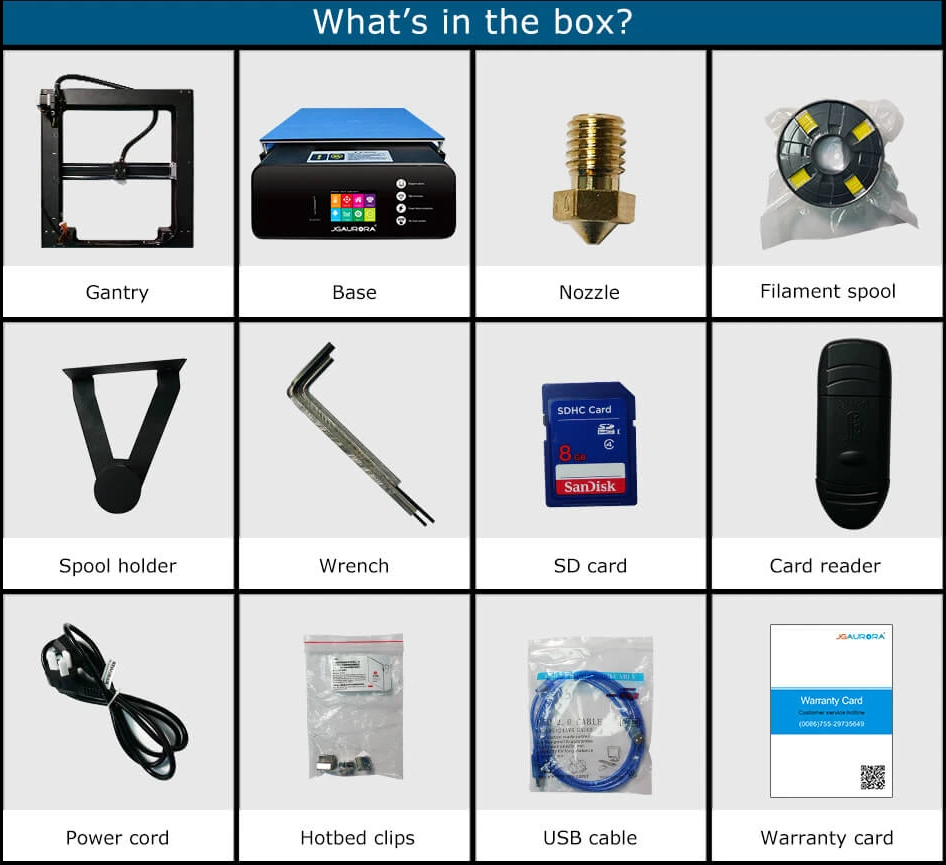
Inside each package, users will find: the printer’s Base as well as its Gantry, the printer’s proprietary nozzle, a Spool Holder Attachment and a Wrench (used to set up the printer), a little plastic bag with a set of 4 Clamp-attachments, a Card Reader and an included SD Card (which contains software, test sample files and an operation manual), the printer’s proprietary Power Cord, a USB Cable to connect the printer to your PC, a free included 500-grams roll of PLA filament, and the unit’s corresponding Warranty Card.
FINAL THOUGHTS
The JGMaker A5S 3D Printer features a robust construction and a great performance overall, and offers you a large printing size of 12″ by 12″ by 12. 6″ with several cool printing features.
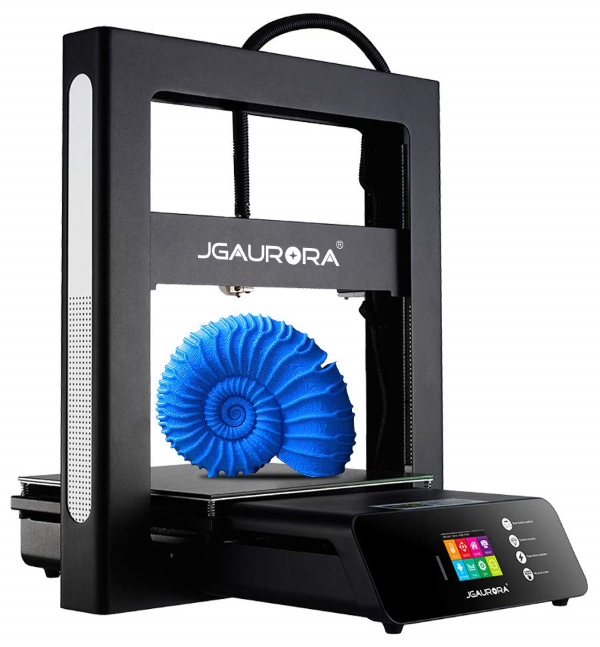
Featuring a fairly easy set up process, as well as several different functionalities and safety features like Smart Assistant Auto Levelling, Filament Run Out Detection, and Power Failure Protection, this 3D Printer literally packs everything you need to get you started on 3D Printing, and that goes for any begginer or expert.
If you’re interested in buying it, each unit is currently discounted from its normal price of $399.00, now going for $379.00 (saves you $20). You can order yours online right now, directly from JGMaker’s official shopping page, which you can access by clicking this link here.


